English
 русский
 Español
 عربى
The short answer: a ceiling laser level is a self-leveling laser that builds a flat reference plane you can transfer onto a ceiling, and its real value is replacing the two-person tape-and-bubble-level routine that makes grid layout slow. The catch is that most cross-line units never throw a beam onto the ceiling at all. You either aim the laser upward from the floor, or you mark the walls at the plane and measure up. Choose the wrong method and even a well-calibrated tool will not save you.
For suspended ceiling grids, recessed lighting runs, tile alignment, soffits and drywall framing, the requirements are the same: a 360-degree horizontal plane, a self-leveling range of roughly ±3 degrees, and an accuracy figure stated in millimetres per 10 m (or inches per 30 ft). Line count matters far less than most buyers assume, because a single accurate horizontal plane already solves the majority of ceiling work.
Content
What a Ceiling Laser Level Actually Does
A ceiling laser level does not fire lines at the ceiling from a tripod; it builds a horizontal plane at the height of its own emitter, and the skill lies in transferring that plane accurately.
That distinction matters because the plane is only visible where it strikes a surface. Stand the laser in the middle of an empty room and the horizontal beam lands on the four walls at emitter height — it never reaches the ceiling. Final accuracy therefore depends on three things: the pendulum inside the unit, its calibration, and how carefully you carry the wall marks upward. The first two are fixed by the manufacturer; the third is entirely in your hands.
Three ways to get the reference onto a ceiling
- Floor-mounted upward beam. Many line lasers can be laid flat or stood on the floor so the horizontal plane sweeps across the ceiling. This suits bathrooms, hallways and small offices, where the line is still readable from a step ladder.
- Wall-line transfer. Set the unit on a tripod at a comfortable height, mark the plane on all four walls, then measure up to the ceiling with a tape at each mark. It costs a few extra minutes but works in any room, with any laser.
- Rotary laser with an upward or plumb beam. A rotating head sweeps a single plane over long distances, and many models also project straight up, giving you a reference dot on the ceiling instead of a full line.
Self-leveling range is the second thing to understand. Beyond roughly ±3 to ±4 degrees of tilt, the pendulum stops compensating and most units blink the beam or sound an alarm. Treat that warning as a hard stop: the plane is no longer reliable, and any line you mark from it will be wrong by the amount of the tilt.
Which Type Handles Ceiling Work Best
For ceilings, a continuous 360-degree horizontal plane is the feature that decides whether a tool is genuinely useful; vertical lines are a bonus that helps you plumb partitions and light runs from the same setup.
| Type | Coverage | Best ceiling use | Accuracy to expect |
|---|---|---|---|
| 2-line / 3-line cross-line | One horizontal plane plus one or two vertical planes | Wall-line transfer in small rooms; limited for full grids | ±3 mm at 10 m |
| 5-line / 8-line multi-line | 360° horizontal plane plus four to eight verticals | Room-sized suspended ceilings, tile, soffits | ±2 to ±3 mm at 10 m |
| 12-line / 16-line 3D | Full cube of horizontal and vertical planes | Complex grids, partitions, service layout | ±2 mm at 10 m |
| Rotary with receiver | Single rotating plane, optional upward dot | Long corridors, open-plan ceilings, exterior soffits | ±1.5 mm at 30 m with a detector |
Cross-line units are the cheapest entry point and remain genuinely useful for wall-line transfer in a bathroom or a small office. Multi-line and 3D models remove the measuring step in mid-sized rooms, because the horizontal plane is continuous through all 360 degrees and can be read anywhere on the four walls without moving the tripod. A 16-line 3D unit goes a step further, projecting a complete cube of planes so you can set a grid position from two directions at once and check partition positions without a second setup.
 16-Line Self-Leveling 3D Laser Level with 8H/8V GridProjects an 8H/8V laser grid for two-direction layouts, with self-leveling, 30 m range, IP54 protection, and tripod mounting for interior wall, floor, and ceiling work.View Product →
How to Mark a Ceiling in Four Steps
Whichever laser you own, the marking sequence is identical, and the order matters more than the equipment. If you have never worked with one of these tools, a basic walkthrough of using a laser level correctly is worth five minutes before you start.
- Decide the reference height first. For a lay-in grid, most installers work from a line 300 to 600 mm below the slab so the grid wire has room. For tile or panel alignment, keep the reference at a round number such as 1200 mm, which keeps the arithmetic simple and the mistakes obvious.
- Set up and verify. Place the tripod near the centre of the room, switch on, and wait until the beam stops blinking. Nudge the tripod deliberately: if the beam blinks, self-leveling is still working. If it stays steady while the tripod is clearly tilted, the lock is on and your plane is a lie.
- Mark the plane on every wall. Pencil a short tick at the same edge of the beam on all four walls — always the top edge, never the middle. Line thickness is typically 2 to 3 mm at 10 m, and switching from one edge to another mid-job introduces an error the same size as the accuracy you paid for.
- Transfer up and check squareness. Measure from each wall tick up to the ceiling plane with a tape, then pencil or snap the lines. Verify with the diagonals: in a rectangular room, the two diagonals must match within roughly 3 mm over 5 m. If they do not, adjust the longest wall first, since that is where the error is most visible.
A mid-range 8-line or 12-line unit covers most domestic and light-commercial ceilings, including the vertical planes you need for partition studs and light drops measured from the same reference.
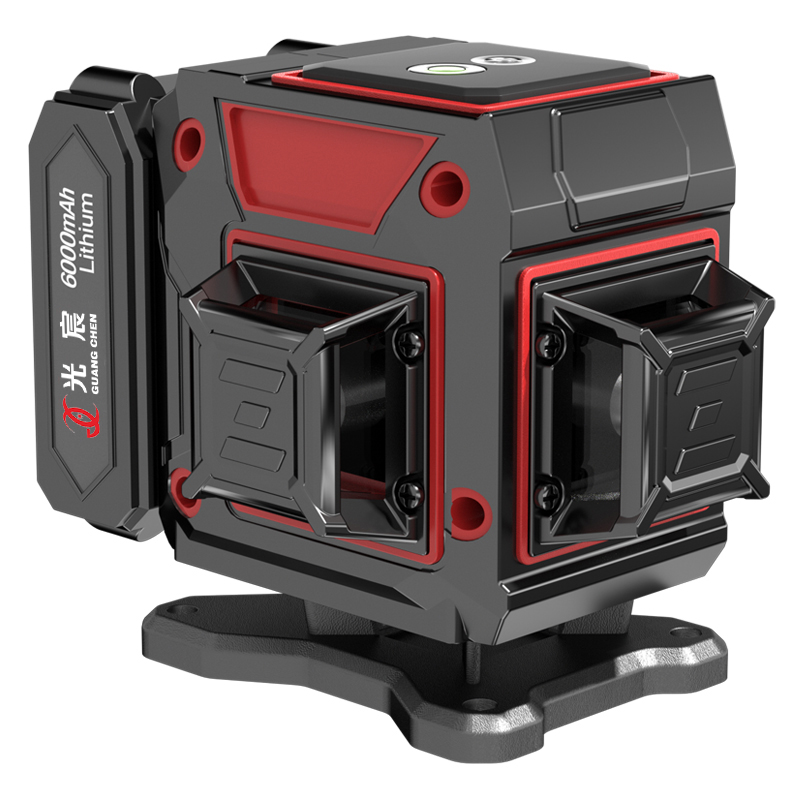 12-Line Self-Leveling Laser Level for Layout and AlignmentProjects 4 horizontal and 8 vertical lines for ceilings, partitions, cabinetry, and framing, with ±3° self-leveling and a compact, drop-resistant housing.View Product →
Accuracy, Tolerances and What to Check Before Buying
Buy the accuracy you can actually justify on site, then check the practical details — those cause far more complaints than the headline accuracy figure. The way a laser level maintains its accuracy and stability over time is as much about the pendulum and housing as about the number printed on the box.
- Stated accuracy per distance. ±2 mm at 10 m is a sensible working standard for interior fit-out; anything vaguer than a per-distance figure is marketing, not a specification.
- Self-leveling range. Demand ±3 degrees as a minimum; ±4 degrees is more forgiving on older, uneven floors.
- Green versus red beam. A green beam is typically three to four times more visible in a lit room, which matters when you are reading a ceiling line from floor level.
- Line thickness. A thin, crisp line matters when marking 600 mm tile grids; a thick, fuzzy beam doubles your layout tolerance before you even start.
- Ingress and drop protection. IP54 and a one-metre drop rating are realistic expectations for a tool that lives on a tripod in dusty rooms.
- Mounting thread. Both 1/4"-20 and 5/8"-11 threads keep you compatible with tripods, clamps and ceiling grid brackets.
- Micro-adjust knob. A fine adjustment for height or vertical position saves you nudging a tripod by fractions of a millimetre.
- Pulse mode. Only relevant if you plan exterior soffits, where a detector extends the working range well beyond visible light.
For small rooms — bathrooms, utility cupboards, hallways — a compact 5-line laser is usually enough, and its smaller housing is easier to stand on a floor or a windowsill when space is tight.
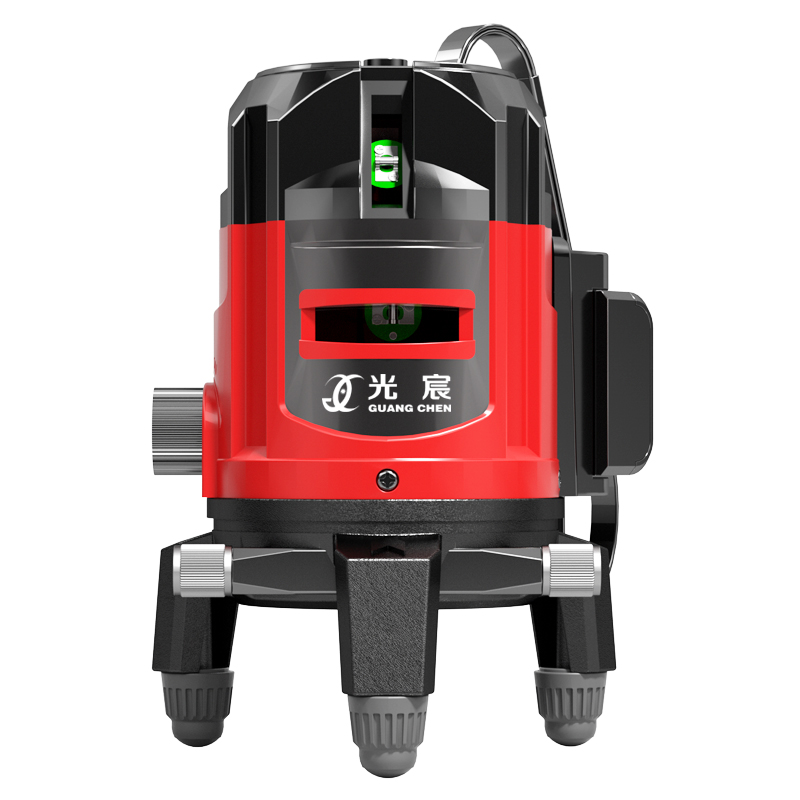 5-Line Laser Level for Small-Room Layout and AlignmentProjects one horizontal and four vertical lines plus five enhancement points, with ±3° self-leveling and IP54 protection for compact bathroom, hallway, and installation tasks.View Product →
Mistakes That Cost Time on Ceiling Layouts
Almost every ceiling layout error traces back to setup, not to the laser itself.
- Using a light, flexible tripod that drifts as you cross the room.
- Ignoring a blinking beam and marking lines from a plane that was never level.
- Measuring up on one wall and assuming the other three follow, especially in rooms with an out-of-square corner.
- Marking the centre of the beam on one wall and the top edge on another, which adds the full line thickness to your layout.
- Setting out from the structural slab instead of the finished ceiling height, then discovering a service duct in the way.
- Leaving the pendulum unlocked during transport, which is the most common cause of a laser drifting out of calibration.
Frequently Asked Questions
Can a standard cross-line laser mark a ceiling?
Yes, using the wall-transfer method. Project the horizontal plane onto all four walls, pencil a tick at the same beam edge, then measure up to the ceiling at each tick. The laser never touches the ceiling, but your grid is still accurate to the tool's stated tolerance.
How accurate does a ceiling laser level need to be?
±2 to ±3 mm at 10 m is sufficient for most suspended grids. On a 600 mm module, that level of error is invisible once tiles are seated; if you are setting out long partition runs, buy at the tighter end of that range.
Red or green beam for interior ceiling work?
Green, whenever the budget allows. Ceiling lines are usually read from below and at an angle, and the extra visibility of a green beam reduces the number of trips up and down a ladder.
What height should I set the laser at?
Any height inside the self-leveling range works, but a round figure such as 1200 mm keeps the transfer arithmetic simple. Keep the tripod clear of ladders and door swings, because a knock costs you the whole setup.
Does a ceiling laser level work outdoors?
Only with a detector and pulse mode. Direct sunlight washes out a visible beam within a few metres, so exterior soffits and canopies are a job for a rotary unit or a receiver, not a bare line laser.
Treat the ceiling laser level as a reference generator rather than a drawing tool, and the workflow becomes predictable: confirm the tool is level, decide one reference height, mark it consistently on every wall, and always verify with diagonals before you cut or fix anything. Get those four habits right and the line count on the box stops being the deciding factor.