English
 русский
 Español
 عربى
عربى
An automatic laser level is a self-leveling measuring tool that projects horizontal and vertical reference lines and automatically brings the beam to level within seconds. Most models self-level over a compensation range of about ±4°, which means you can place the tool on a slightly sloped floor or shelf and it will correct the tilt on its own. If the slope exceeds that range, the unit flashes the laser line instead of projecting a false level — a fail-safe worth looking for.
The practical payoff is speed. On a typical indoor layout job, you can establish level lines around a room in minutes without a spirit level, a string line, or an extra pair of hands. Contractors reach for these tools for framing, tiling, electrical and plumbing rough-in, suspended ceilings, and cabinet installation. In short, an automatic laser level is the fastest way to transfer a true horizontal or vertical reference across a room.
Content
- How an Automatic Laser Level Self-Levels
- Key Specifications to Evaluate Before Buying
- Line Configurations: 2, 3, 5, 8, 12, or 16 Lines
- Automatic vs. Manual vs. Rotary Laser Levels
- How to Choose the Right Automatic Laser Level
- Common Uses on the Job
- Calibration Checks and Daily Care
- Automatic Laser Level FAQ
How an Automatic Laser Level Self-Levels
A self-leveling laser works with a gravity-sensing pendulum and an optical compensator. The laser diode is mounted on the pendulum, which hangs from a low-friction pivot. When the housing is tilted, the pendulum stays vertical under gravity, and the compensator — a set of prisms or mirrors — redirects the beam into an exactly horizontal plane. Magnetic damping lets the pendulum settle in about three seconds.
The self-leveling range is the maximum tilt the tool can correct, normally ±3° to ±4°. A floor slope of roughly 7 cm over 1 m equals about 4°, so even noticeably uneven concrete or wooden subfloors fall within the correction range. When the housing is beyond its leveling range, most automatic laser levels refuse to lock in a false position: the line flashes, and some models beep until you re-level the unit. A pendulum lock secures the moving parts during transport and while the unit is switched off.
Key Specifications to Evaluate Before Buying
When comparing automatic laser levels, focus on five numbers and features: accuracy, self-leveling range, working range, laser color, and environmental protection. Together they define what the tool can handle and how confidently you can trust its lines.
| Specification | Typical value | Why it matters |
|---|---|---|
| Accuracy | ±3 mm per 10 m (±1/8 in. per 30 ft) | Defines the maximum error over distance; a lower number gives more reliable layouts. |
| Self-leveling range | ±3° to ±4° | A wider range allows set-up on sloped floors and stairs without shimming. |
| Working range | 20–40 m indoors; 50 m or more with a receiver | Determines whether one setup covers a whole room or requires re-positioning. |
| Laser color | Red or green | Green beams are easier to see in daylight and large rooms; red models cost less and run longer on batteries. |
| Ingress protection | IP54 | Confirms protection against dust and water splashes on typical job sites. |
Line Configurations: 2, 3, 5, 8, 12, or 16 Lines
The line count tells you how many reference lines the unit projects at the same time. More lines mean more walls covered without moving the laser. For small indoor jobs, a 2- or 3-line unit is normally enough; for whole-room or multi-wall layouts, an 8-, 12-, or 16-line model saves real time on site.
- 2-line: one horizontal and one vertical line, used for hanging cabinets, pictures, and door frames.
- 3-line: adds a second vertical at 90°, handy for tile layouts and corner-to-corner transfers.
- 5-line: one horizontal plus four verticals, giving a four-wall reference from a single setup.
- 8-line: adds intermediate vertical and horizontal planes for corridors, partitions, and openings.
- 12-line: full-circle horizontal coverage plus multiple vertical planes for complete room layout.
- 16-line: two full-circle horizontal lines plus several vertical planes, designed for large rooms and commercial fit-out.
If your work is mainly residential renovations and furniture installation, an entry-level model such as a 3-line laser keeps the cost low while covering most common layouts.
For general contractors doing drywall, ceilings, and electrical rough-ins, an 8-line automatic laser level is the typical sweet spot because it projects enough planes to cover a room without frequent re-positioning.
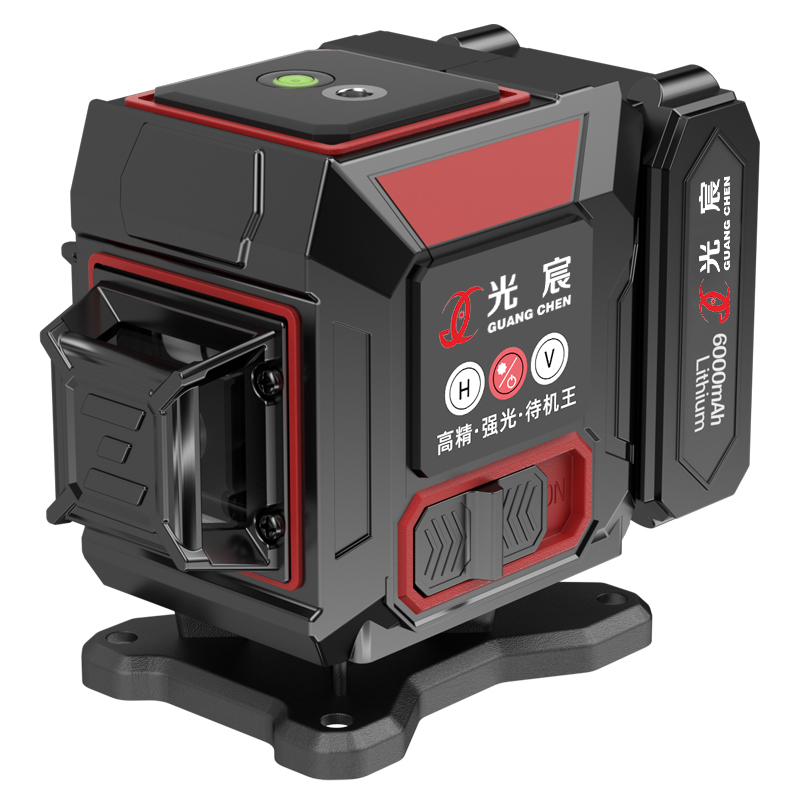 8-Line Automatic Self-Leveling Laser Level for Indoor Rough-InsThis 8-line unit projects four horizontal and four vertical lines, covering a room with minimal re-positioning. Its automatic leveling and IP54 rating support drywall, ceiling, and electrical work.View Product →
Large commercial spaces benefit from a 16-line unit, which reduces re-positioning to almost nothing and keeps a continuous reference across the entire work area.
 16-Line High-Precision Laser Level for Large Commercial SpacesWith eight horizontal and eight vertical lines, this model maintains continuous references across a wide area, reducing frequent repositioning. It suits interior layout tasks on walls, floors, and ceilings.View Product →
Automatic vs. Manual vs. Rotary Laser Levels
Most indoor users should choose an automatic self-leveling laser. Manual laser levels require you to level the housing yourself using bubble vials; they are useful when you deliberately need a sloped line, for example on stairways or angled soffits. Rotary laser levels spin a beam 360° and are built for large outdoor sites, where they work with a laser detector over distances of 100 m or more.
| Type | Leveling method | Typical range | Best use |
|---|---|---|---|
| Automatic | Self-leveling within ±4° | Up to 40 m, more with a detector | Indoor layout, installation, finishing work |
| Manual | Adjusted by hand with vials | Similar to automatic | Sloped or angled reference lines |
| Rotary | Self-leveling spinning head | 100 m or more with a detector | Outdoor grading and large-site layout |
How to Choose the Right Automatic Laser Level
The right automatic laser level matches your most common working distance, room size, and precision requirements. Start with these questions.
- Accuracy: look for ±3 mm per 10 m or better; a smaller number means a more reliable reference over distance.
- Self-leveling range: a wider ±4° range cuts set-up time on uneven surfaces.
- Working range: check whether a receiver is included or available, especially for bright or outdoor sites.
- Laser color: green is easier to see at distance and in daylight; red is usually cheaper and runs longer on batteries.
- Power source: built-in lithium batteries and standard AA batteries are the two common options; plan for spare batteries on long shifts.
- Mounting and accessories: a 1/4-inch tripod thread, a wall-mount bracket, and a sturdy carry case make daily use noticeably easier.
Common Uses on the Job
Automatic laser levels are standard equipment across construction and finishing trades because one set-up replaces hours of manual measuring.
- Framing and drywall: lay out studs, tracks, and panel edges.
- Tiling and flooring: establish reference lines for adhesive rows and grout joints.
- Electrical and mechanical rough-in: level outlets, switches, conduit, and ducting.
- Cabinetry and shelving: align cabinets, bench tops, and shelf runs.
- Ceilings and soffits: project lines for suspended ceiling grids and bulkheads.
- Outdoor work: pair the unit with a detector for foundations, retaining walls, and landscape edges.
For placement advice and common mistakes to avoid, see the guide on how to use the laser level correctly.
Calibration Checks and Daily Care
Like any precision instrument, an automatic laser level keeps performing at its best when it is handled carefully and checked periodically.
- Check accuracy before important layouts by comparing the projected line against a known level surface or two reference marks.
- Engage the pendulum lock before transport and whenever the unit is stored in its case.
- Wipe the laser windows with a soft, dry cloth; never use solvents or abrasive cleaners.
- After a drop or hard knock, verify calibration against a reference wall before relying on the tool for a full shift.
Automatic Laser Level FAQ
What does self-leveling range mean?
Self-leveling range is the maximum tilt from horizontal that the laser can correct on its own. Typical values are ±3° to ±4°. Beyond that range, the laser flashes to indicate it cannot level itself, so the projected line is not a true level reference.
Can I use an automatic laser level outdoors?
Yes, but visibility is the limiting factor. In daylight, red and green beams fade quickly at distance. Adding a laser detector extends the usable range and is essential for outdoor layouts and long indoor corridors.
Which is better: green or red laser?
Green is roughly twice as visible to the eye, so it performs better in daylight and large rooms, at the cost of higher power consumption and price. Red is more economical and battery-friendly, which is fine for typical indoor jobs.
How accurate is an automatic laser level?
Professional models typically state ±3 mm at 10 m, and higher-end units may reach ±1.5 mm at 10 m. That accuracy holds on a stable setup; a low-quality tripod or soft flooring adds error no matter how good the laser is.