English
 русский
 Español
 عربى
عربى
Hanging a picture should be a five-minute job, but it becomes a chore when the frame sits half an inch low on one side or a gallery wall slopes behind you. A laser level removes the guesswork. It is a tool that projects a straight, level reference line onto a wall so you can mark hanger positions with confidence. The short answer is: set the level on a stable surface, project a level line at your chosen height, mark the hanging points from the frame onto the wall, install the hardware, hang the picture, and verify with the same line.
We have spent the last two decades manufacturing laser levels and working with installers, so the method below reflects the version we recommend to buyers and users who want to stop re-drilling holes.
Content
- Why a Laser Level Beats a Bubble Level for Hanging Pictures
- How to Use a Laser Level to Hang Pictures: Step-by-Step
- Hanging Several Pictures: Two Reliable Layouts
- Heavy Frames: Combine a Laser Level with a Stud Finder
- How to Choose a Laser Level for Picture Hanging
- Common Mistakes and Practical Tips
- FAQ: Using a Laser Level to Hang Pictures
Why a Laser Level Beats a Bubble Level for Hanging Pictures
The reason is simple: a laser level gives you a fixed reference line that stays still whether you are marking one frame or ten, while a bubble level only tells you whether the tool you are holding is level at that exact moment.
| Feature | Laser Level | Bubble Level |
|---|---|---|
| Reference line | Projects a continuous line on the wall | Requires you to press the level flat against the wall and mark as you go |
| Multiple pictures | One line can guide an entire gallery wall | Each frame needs its own measurement |
| Working alone | Beam stays visible while you step back to check | Hard to hold and read the bubble at the same time |
| Height transfer | Line crosses the hanger points directly | Must measure from floor or ceiling with a tape measure |
| Speed | Set up once, mark many frames | Re-level for every frame |
The practical advantage shows up as soon as you hang the second frame: the laser line keeps the second and third frames at exactly the same height without re-measuring.
How to Use a Laser Level to Hang Pictures: Step-by-Step
Follow the five steps below. Each step starts with the result you are aiming for, then explains how to get there.
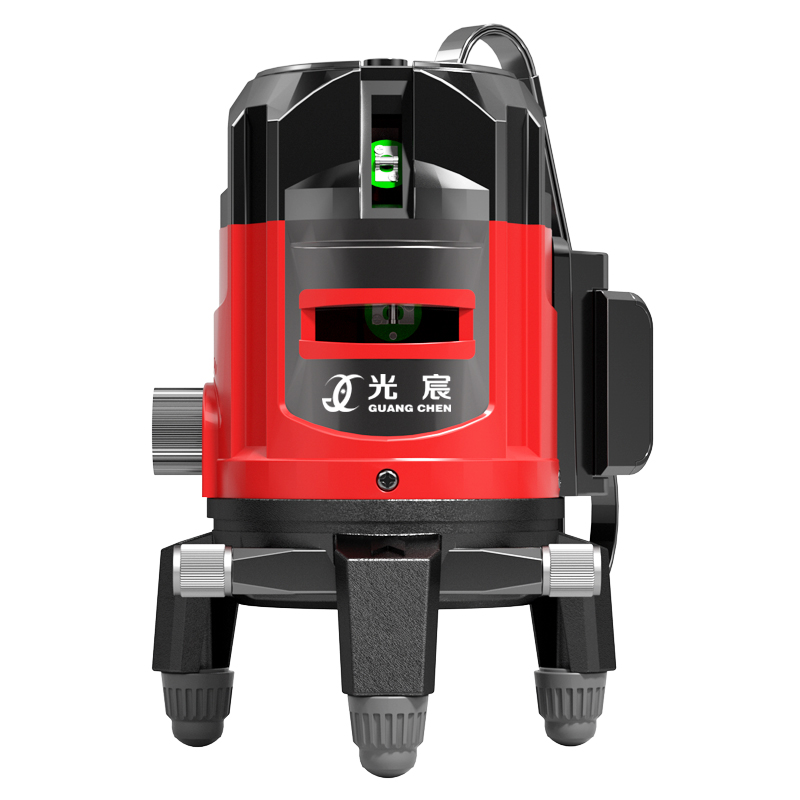 5-Line Laser Level for Precise Wall LayoutIdeal for single-frame hanging, this 5-line level projects one horizontal and four vertical lines to mark hanger points accurately on walls or floors.View Product →
Step 1: Set Up the Laser Level
Place the laser level on a stable tripod, a table, or the floor roughly 3 to 6 feet from the wall, so the full intended hanging area is covered by the beam.
Choose a tool that matches the layout. A 2-line laser level projects a single horizontal line, which works for one frame. A 5-line laser level adds vertical and cross lines, so you can align multiple frames and keep them centered over a wall feature. Check the battery, turn the device on, and give it one or two minutes to self-level if the model has a self-leveling system.
Step 2: Choose the Height and Project the Reference Line
Decide the height of the picture center or the alignment edge, then move the level until the laser line crosses that exact point on the wall.
Traditional gallery height is 57 to 60 inches from the floor for single pictures, but a hallway or a stairwell may need a different height. Mark the chosen height on the wall with a pencil, then rotate or slide the laser level until its beam meets that mark. If you hang a group, you can position the line as a common centerline or a common top edge.
Step 3: Transfer the Hanging Points from the Frame
Measure the distance from the top edge of the frame to each hanger, then measure the same distance downward from the laser line on the wall and mark both points with a pencil.
Most frames have two D-rings or sawtooth hangers. Turn the frame over, measure from the top edge to the center of each hanger, and write down both distances. On the wall, use the laser line as the reference top edge: measure down from that line and make a pencil mark for each hanger. This prevents the common mistake of marking the hanger positions in the wrong place relative to the frame.
Step 4: Install the Hardware and Hang the Picture
Drill or nail at the marked points, insert wall anchors if needed, and hang the frame on the hardware.
For drywall, use a high-quality anchor rated above the weight of the frame. For a mirror or a large frame, locate studs so you can screw directly into wood. After the first hanger is in place, do not drive the second anchor until you have checked that the frame sits level.
Step 5: Fine-Tune and Verify
Turn the laser back on and confirm that the beam still aligns with the top edge of the frame or with a centerline you marked.
Small adjustments are normal. If the frame drifted, loosen one hanger and nudge the frame until the line matches, then tighten the hanger. Check that the gap between the frame and the wall is even so the picture does not rock.
Hanging Several Pictures: Two Reliable Layouts
Two patterns cover most multi-picture situations: a shared centerline and a shared height. Choose before you mark anything.
Same Center Line
For a row of pictures with different heights, align the vertical center of every frame with the laser line.
Project a horizontal line at the intended center height, then for each frame measure the distance from the frame center to its hangers and transfer those measurements onto the wall. This creates the classic gallery row look and keeps every frame visually balanced.
Same Top Edge
For a group of frames with similar proportions, line up their top edges along the laser line.
Set the laser at the height where the top edges should meet. For each frame, measure down from the top to the hanger point and mark the wall. This layout works well for two or three frames hung side by side above a sofa, a console table, or a headboard.
 16-Line Laser Level for Complex Wall LayoutsWhen dealing with multiple frames or large areas, this 16-line level provides simultaneous horizontal and vertical references to ensure level and plumb installation.View Product →
When the wall layout is more complex or you need both horizontal and vertical reference lines across a large area, a 16-line laser level gives you multiple simultaneous lines. It is also useful when you need to check that a row of frames is not just level but also perfectly vertical relative to the wall features.
Heavy Frames: Combine a Laser Level with a Stud Finder
Heavy mirrors and large framed artwork should be attached to wall studs, not only to drywall anchors.
Project the laser line at the chosen height, then run a stud finder across that area to locate the centers of the studs. Mark the stud centers, drill pilot holes, and install screws directly into the wood. For very large frames, consider two screws per stud and check the wall for electrical wiring before drilling. A 3-inch screw normally provides a strong connection in a wooden stud.
How to Choose a Laser Level for Picture Hanging
For most home use, a 2-line or 3-line laser level is enough to hang a single picture accurately. If you plan to hang a whole gallery wall, step up to a 5-line model with vertical and cross lines.
| Job | Recommended Line Count | Why |
|---|---|---|
| Single frame | 2 lines | One horizontal line is all you need |
| Two frames side by side | 3 lines | Horizontal line plus one vertical reference for spacing |
| Gallery wall | 5 lines | Cross line helps align both height and center |
| Long hallway or staircase | 8 to 16 lines | Multiple lines cover slopes and different wall planes |
Do not overbuy for a simple task: a 16-line self-leveling laser is a trade tool, not a necessary purchase for hanging two pictures in a living room. However, if you already own a higher-model level, it will do the job just as well.
2-Line Laser Level for Simple Hanging TasksA compact and lightweight option for basic leveling needs, projecting one horizontal and one vertical line—sufficient for hanging two pictures without extra features.View Product →Common Mistakes and Practical Tips
Keep these eight things in mind and the process becomes smoother on the first attempt.
- Use a pencil on painted walls instead of a permanent marker. The laser line is temporary, but your marks do not have to be.
- Place the laser level on a stable surface that will not shake. A wobbly tripod or a pile of books can make the beam drift.
- Set the level close enough to the wall so the line is crisp. On a dark wall, the beam may look weaker from farther away.
- Wait two or three seconds for the self-leveling mechanism to settle before marking. Some levels beep or blink during leveling.
- Buy a level with a rotating base if you often hang pictures in stairwells or against sloped ceilings.
- Use a stud finder for heavy frames, and mark stud centers before drilling.
- Keep the laser level away from direct sunlight or bright windows when possible. The beam becomes harder to see.
- Check battery level before you start. A dim laser line can lead to inaccurate marks.
For a deeper look at the physics of the beam, our article on how a laser level ensures accuracy and stability covers the internal mechanisms behind stable reference lines.
FAQ: Using a Laser Level to Hang Pictures
Do I need a tripod to hang pictures with a laser level?
No. A tripod helps, but a steady table, shelf, or a hard floor within a few feet of the wall works just as well for most projects.
Which line count should I choose for a gallery wall?
A 5-line laser level is the most flexible option because it gives you a horizontal line for height and a vertical line for centering. A 2-line level can still work if you move the device between tasks.
Can a laser level help me hang a picture without a second person?
Yes, that is one of its main benefits. The beam stays on the wall while you measure and mark, so you do not need anyone to hold a level or a tape measure.
What if the laser line does not reach my wall?
Move the level closer to the wall or place it on a higher surface. If the line is still faded, replace the batteries, or use a level with a stronger diode if you work in large rooms.
Do I still need a bubble level after using a laser level?
No, for setup you do not need a bubble level, but you should keep one in your toolbox for occasional checks. The laser level is the faster and more accurate reference for hanging pictures.
Use a laser level the right way and hanging pictures becomes a repeatable, clean job instead of a morning of re-drilling. Set the level, project the line, transfer the hanger positions, and verify after every frame. The process takes a little longer the first time, but by the third frame you will be moving much faster and with less frustration.
If you are not sure how to set up your particular device, we have more on how to use a laser level correctly to ensure measurement accuracy. The same principles apply whether you are using a 2-line model for one picture or a 16-line model for a complete room layout.