 English
 русский
 Español
 عربى
عربى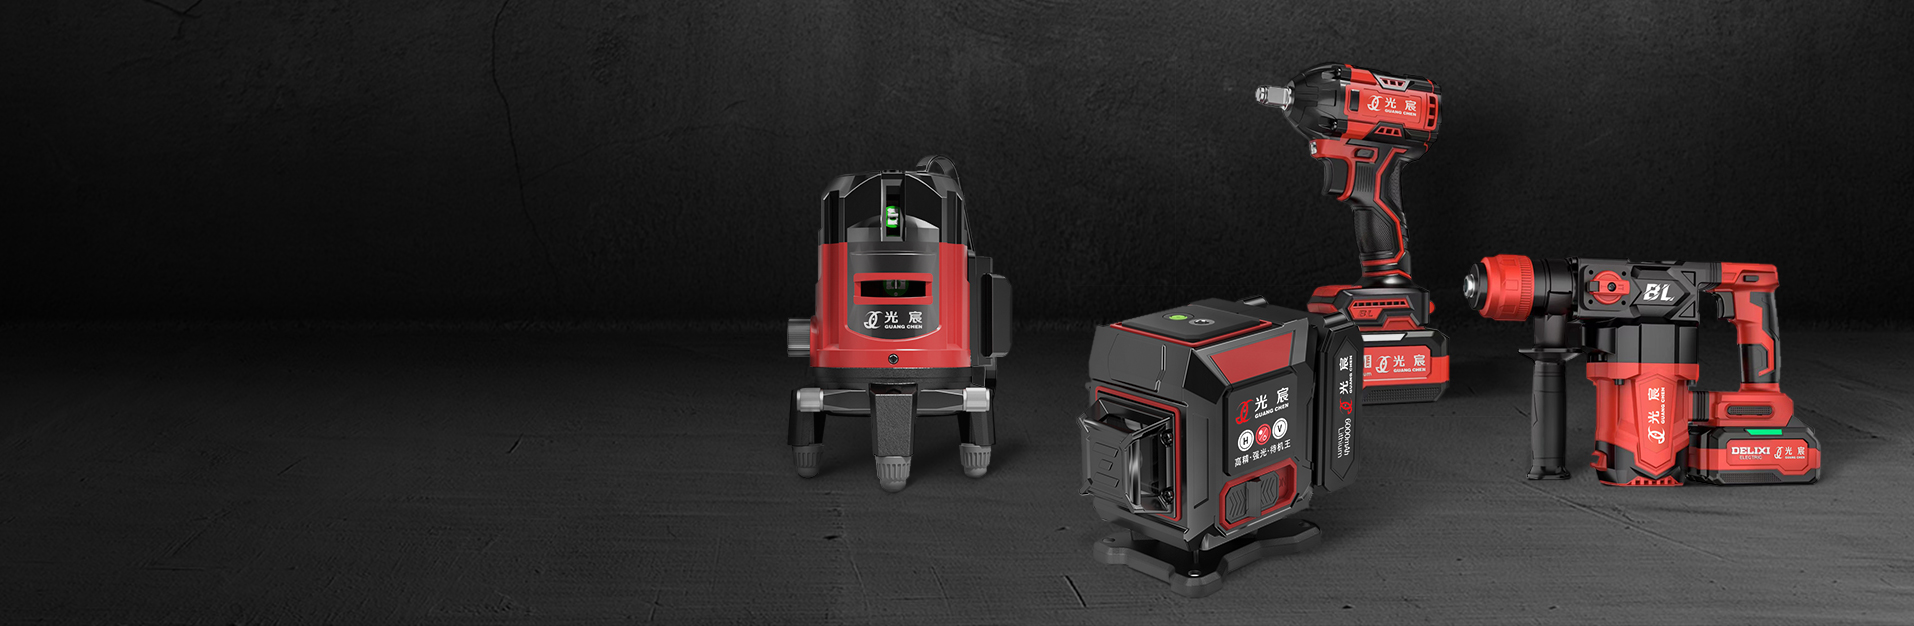
A laser construction level is a precision instrument that projects a visible laser beam — horizontal, vertical, or both — across a work surface to establish a perfectly flat, plumb, or square reference line without the measurement errors inherent in spirit levels, string lines, or chalk snaps. According to the Global Construction Laser Market Report (Grand View Research, 2023), the construction laser sector was valued at USD 2.74 billion in 2022 and is projected to grow at a CAGR of 5.8% through 2030, driven by demand for faster, more accurate layout on commercial, residential, and civil infrastructure projects. Whether you are aligning suspended ceilings, setting concrete formwork, installing curtain-wall facades, or grading a building pad, choosing the right laser construction level — and knowing how to use it correctly — directly determines whether your project passes inspection and stays on schedule.
Content
- How Does a Laser Construction Level Work?
- What Are the Main Types of Laser Construction Levels?
- Which Laser Construction Level Is Right for Your Project? A Direct Comparison
- Why Use a Laser Construction Level Instead of a Traditional Spirit Level?
- What Key Specifications Should You Check Before Buying a Laser Construction Level?
- How to Set Up and Use a Laser Construction Level Correctly
- How to Maintain and Calibrate a Laser Construction Level
- What Are the Most Common Mistakes When Using a Laser Construction Level?
- Frequently Asked Questions About Laser Construction Levels
- Q1: How accurate is a laser construction level compared to an optical level?
- Q2: Can a laser construction level be used outdoors in bright sunlight?
- Q3: Is a green or red laser better for construction use?
- Q4: What IP rating do I need for a laser construction level on a construction site?
- Q5: How often should a laser construction level be calibrated?
- Q6: What is the difference between a self-leveling and a manual laser construction level?
- Q7: Should I buy or rent a laser construction level?
- Laser Construction Level Buying Checklist: 8 Questions to Ask Before You Purchase
How Does a Laser Construction Level Work?
A laser construction level works by emitting a focused laser beam from a diode, then expanding or rotating that beam through a lens or spinning mirror system to project a continuous line — or a full 360-degree plane — onto surrounding surfaces at a precise elevation or angle. The core operating principle varies by type, but all professional-grade units share three fundamental mechanisms:
- Laser Diode: The light source, typically red (635–650 nm wavelength) or green (515–532 nm wavelength). Green laser diodes are perceived as approximately 4 times brighter than red by the human eye at equivalent power output, extending visible working range in daylight conditions by 20–40% (Source: Laser Institute of America, 2021).
- Self-Leveling Compensator: A pendulum or electronic servo compensator that automatically levels the beam within a defined tilt range — typically ±3° to ±5° for pendulum models and ±5° to ±8° for electronic models. If the instrument is tilted beyond its self-leveling range, a lockout alarm sounds or the beam blinks, preventing workers from using an unlevel reference. This single feature eliminates the most common source of layout error in traditional leveling.
- Beam Delivery System: Fixed-diode models project a static dot or cross-line. Rotating models use a motorized spinning prism or pentaprism to sweep the beam in a 360-degree horizontal or vertical plane at speeds of 100–1,200 RPM, creating a continuous visible level ring around an entire room or job site.
Modern laser construction levels achieve accuracy figures of ±1/16 inch at 100 feet (±1.5 mm at 30 m) for professional-grade rotating models, and ±1/8 inch at 30 feet for entry-level cross-line units — accuracy levels impossible to match consistently with a bubble level or string line, particularly on large commercial sites where temperature gradients, wind, and vibration affect traditional methods.
What Are the Main Types of Laser Construction Levels?
There are five principal categories of laser construction level, each optimized for a specific range of tasks, working distances, and job-site conditions. Selecting the wrong category is the most common reason contractors underperform on accuracy or overspend on equipment.
1. Cross-Line Laser Level
A cross-line laser construction level projects one horizontal and one vertical laser line simultaneously, forming a bright cross-hair pattern on walls and surfaces — the most versatile indoor layout tool available. Cross-line units are the dominant choice for tiling, framing partition walls, installing cabinetry, setting door and window frames, and hanging fixtures, delivering accuracy of ±1/8 inch at 33 feet (10 m) in a compact, battery-powered package. Working range indoors is typically 30–100 feet (10–30 m) unaided, extending to 165 feet (50 m) with a compatible laser detector. According to Construction Executive Magazine (2022), cross-line laser levels account for approximately 48% of all construction laser unit sales globally, making them the single most widely used category.
2. Rotating Laser Level
A rotating laser construction level spins a laser beam 360 degrees in a horizontal plane to project a continuous level ring across an entire room, floor, or exterior site — the standard instrument for large-scale interior fit-out, concrete slab elevation control, foundation grading, and site preparation. Professional rotating lasers achieve accuracy of ±1/16 inch at 100 feet with working ranges of 800–2,000 feet (245–610 m) diameter when paired with a laser detector and grade rod, far exceeding the capability of any optical level in speed and single-operator efficiency. A rotating laser used by one operator on a concrete pour can replace two operators using a traditional optical level and rod, cutting labor costs by approximately 30–40% per poured bay (Source: National Ready Mixed Concrete Association, 2021).
3. Dot / Plumb Bob Laser Level
Dot laser levels project one or more highly accurate plumb-up, plumb-down, and horizontal reference points rather than continuous lines. A 5-point dot laser — projecting up, down, left, right, and forward — is the precision tool of choice for transferring reference points between floors in multi-story construction, aligning structural columns, positioning mechanical equipment pads, and setting elevator shaft plumb lines. Dot laser accuracy is typically tighter than cross-line models: ±1/16 inch at 100 feet (±1.5 mm at 30 m) in professional models, with some survey-grade units achieving ±1/32 inch at 100 feet.
4. Grade (Slope) Laser Level
A grade laser construction level can tilt the rotating beam to a precise slope angle — typically adjustable from -25% to +25% on professional units — enabling single-pass grading of drainage channels, road subbase, parking lots, athletic fields, and agricultural drainage systems. Grade lasers replace the manual re-staking and string-line setups required for sloped surfaces, reducing grading layout time by up to 50% on typical earthworks projects (Source: Associated General Contractors of America, 2022). Dual-grade models can set independent slopes on two axes simultaneously — essential for complex drainage work where both X and Y grades must be controlled.
5. Pipe Laser Level
A pipe laser construction level is a self-contained unit designed to be placed inside a pipe trench and project a beam along the pipe centerline at a precisely set grade, giving workers a continuous alignment reference for underground drainage, sewer, and water line installation. Pipe lasers achieve grade accuracy of ±1/16 inch over 100 feet and are the mandatory instrument for any sewer installation required to pass post-installation CCTV inspection under municipal standards. Incorrect pipe grade is responsible for approximately 34% of sewer blockage failures within the first five years of installation (Source: Water Research Foundation, 2020), making pipe laser use effectively non-negotiable on public works drainage contracts.
Which Laser Construction Level Is Right for Your Project? A Direct Comparison
Choosing the correct laser construction level type before purchasing or renting prevents the two most costly mistakes in construction layout: under-specifying (producing inaccurate work that fails inspection) and over-specifying (renting a $3,000 rotating laser for a $200 tile job). The table below provides a direct, task-based comparison:
| Laser Type | Typical Accuracy | Working Range | Best Applications | Typical Price Range |
|---|---|---|---|---|
| Cross-Line | ±1/8 in / 33 ft | 30–100 ft (unaided) | Tiling, framing, cabinets, fixtures | $50–$400 |
| Rotating | ±1/16 in / 100 ft | Up to 2,000 ft diameter | Slabs, foundations, large interiors, site grading | $300–$3,500 |
| Dot / Plumb | ±1/16 in / 100 ft | 30–300 ft | Column alignment, floor-to-floor transfer, MEP | $100–$800 |
| Grade / Slope | ±0.01% grade | Up to 2,000 ft diameter | Road subbase, drainage, athletic fields | $800–$5,000 |
| Pipe Laser | ±1/16 in / 100 ft | Up to 1,500 ft | Underground sewer, drain, culvert installation | $400–$12,000 |
Table 1: Comparison of the five main laser construction level types by accuracy, working range, best applications, and typical purchase price range.
Why Use a Laser Construction Level Instead of a Traditional Spirit Level?
A laser construction level outperforms a traditional spirit level (bubble level) on every measurable performance criterion except initial purchase cost — and on any project larger than a single room, the speed advantage of laser tools eliminates that cost gap within the first day of use. The performance gap widens dramatically as project size increases:
| Performance Factor | Laser Construction Level | Spirit Level / String Line |
|---|---|---|
| Accuracy over 30 ft | ±1/16 to ±1/8 in | ±1/4 to ±1/2 in (cumulative error) |
| Time to establish level line across 40 ft room | Under 2 minutes (self-leveling) | 15–30 minutes (chalk line + checks) |
| Operator requirement | 1 operator (self-contained) | 2 operators for long runs |
| Wind / vibration sensitivity | None (electronic or pendulum compensator) | High (string line deflects; bubble disturbed) |
| Grade (slope) setting | Programmable (0.01% resolution) | Manual calculation and staking required |
| Reference visibility | Continuous 360-degree line (rotating model) | Point-to-point only; must re-measure at each station |
| Error detection | Out-of-level alarm (beam blinks or stops) | No alarm; errors propagate silently |
Table 2: Head-to-head comparison of laser construction level versus traditional spirit level and string line across key performance factors.
A 2022 independent time-and-motion study published by the Chartered Institute of Building (CIOB) found that construction teams using laser construction levels on suspended ceiling installation completed layout 58% faster than equivalent teams using traditional levels, with a rework rate of 0.8% versus 4.3% for non-laser teams — a direct quality improvement that more than offset the equipment rental cost on any job lasting more than two days.
What Key Specifications Should You Check Before Buying a Laser Construction Level?
Eight technical specifications separate a laser construction level that performs reliably on a professional job site from one that fails within the first month of use. Evaluate each before committing to a purchase or long-term rental:
- Accuracy (Self-Leveling): Stated as ± X inch at Y feet. Professional standard for construction is ±1/16 inch at 100 feet (±1.5 mm at 30 m) for rotating lasers; ±1/8 inch at 33 feet for cross-line units. Consumer-grade units may state ±3/16 inch at 33 feet — unacceptable for structural or mechanical layout work.
- Self-Leveling Range: The maximum tilt from which the instrument can automatically correct to level, typically ±3° to ±5° for pendulum models and ±5° to ±8° for electronic servo models. A wider self-leveling range matters on uneven ground or when mounting on a surface that cannot be precisely leveled before use.
- Working Range: The maximum distance at which the laser beam can be detected — either visually (unaided) or with a receiver/detector. Always confirm whether the stated range is visual or detector-assisted; a laser stated to work at 1,000 feet typically requires a detector at that distance.
- IP Rating (Dust and Water Resistance): IP54 provides splash and dust resistance adequate for most indoor construction environments. IP65 (dust-tight, water jet resistant) and IP67 (immersion to 1 meter) are required for outdoor earthworks and wet concrete environments. Investing in a higher IP rating prevents the most common cause of laser level premature failure — moisture damage from rain, concrete wash, and humidity.
- Laser Class and Color: Class 2 (below 1 mW) and Class 3R (1–5 mW) are the standard construction categories; Class 3R green lasers provide the best combination of visibility and eye safety for job-site use. Green beam units are recommended for outdoor use or large interiors; red beam units are adequate for small indoor spaces and offer longer battery life.
- Battery Life: Professional rotating lasers should provide a minimum of 20 hours continuous operation on a full charge. Units with less than 10 hours battery life require mid-shift recharging — an unacceptable interruption on a production pour or site grading operation. Lithium-ion rechargeable packs maintain consistent output down to -4°F (-20°C) better than alkaline AA batteries.
- Drop Protection: Stated as IK rating (impact resistance) or as a drop-height specification (e.g., "1-meter drop onto concrete"). Professional job sites see an average of 2.3 drops per instrument per year (Source: Tool Safety Council, 2021); a rubber over-mold housing and internal shock mount are essential features, not optional upgrades.
- Detector / Receiver Compatibility: Confirm that the laser includes or is compatible with a digital detector for outdoor and long-range use. A detector extends working range by 3–5x and allows use in full sunlight where the laser dot or line is invisible to the naked eye. Some units use proprietary detector frequencies and are incompatible with third-party detectors — a significant life-cycle cost consideration.
How to Set Up and Use a Laser Construction Level Correctly
Correct setup of a laser construction level takes less than five minutes and determines the accuracy of every measurement made during the working day — yet it is the step most commonly skipped or rushed by inexperienced operators, leading to systematic layout errors that propagate across an entire floor or structure.
- Position the Tripod on Stable Ground: Set the tripod on firm, compacted surface — not on fresh fill, loose gravel, or floor screed that has not fully cured. Tripod foot settlement of just 1/8 inch can displace the projected line by over 1/4 inch at 30 feet. Use a wooden base plate or mud board if the ground is soft.
- Rough-Level the Instrument: Adjust the tripod legs so the instrument is within the self-leveling range — typically within ±5°. Most instruments have a circular bubble vial on the base for this purpose. Do not skip this step even on electronic units; forcing the compensator to work at the limit of its range degrades accuracy.
- Power On and Allow Self-Leveling: Switch on and wait 10–15 seconds for the compensator to stabilize before taking any readings. Moving the instrument or tripod during compensator stabilization introduces errors.
- Verify Against a Known Benchmark: Before beginning layout, check the projected laser height against a verified benchmark elevation — a datum nail, benchmark rod, or previously established floor mark. A calibration drift of 1/8 inch in a laser that has been dropped or transported roughly is enough to cause a floor pour to fail flatness specifications.
- Set Grade (If Required): For grade laser applications, input the required slope percentage using the digital display or remote control. Always verify the grade display reads the decimal in the correct position before the first mark is transferred — a 10x decimal error (entering 1.5% when 0.15% is required) is the most frequently reported operator mistake on drainage projects.
- Protect the Instrument During Operation: Position the laser where it will not be struck by materials, equipment, or foot traffic. Any impact that moves the instrument during a survey requires returning to the benchmark to re-verify level. On active pours or grading operations, use a protective cage or elevated tripod position if traffic cannot be controlled.
How to Maintain and Calibrate a Laser Construction Level
A laser construction level that is not calibrated is more dangerous than no instrument at all — it gives the false confidence of a measurement reference while introducing systematic errors. Calibration drift is the primary reason laser levels fail on the job without any visible external damage.
- Daily Field Check: At the start of each working day, verify the laser level against a known point at the maximum working distance expected that day. Mark a wall at the laser height at 30 feet, rotate the laser 180 degrees, and re-read the same wall. Any discrepancy indicates the compensator is out of adjustment. A difference greater than 1/8 inch at 30 feet means the instrument must be recalibrated before use.
- After Any Drop or Impact: Re-verify calibration immediately. Drops from less than 24 inches onto concrete are sufficient to shift the compensator on many professional-grade units. Per the Instrument Society of America (ISA) guidelines, any instrument that has experienced an uncontrolled impact should be considered out of calibration until verified.
- Annual Factory Calibration: Professional laser construction levels should be returned to the manufacturer or an authorized service center for calibration verification every 12 months, or after any significant impact. On public works and government contracts, a current calibration certificate is frequently a contract requirement. The cost of annual calibration is typically $75–$200 per instrument — a small fraction of the cost of rework caused by an uncalibrated reference.
- Storage and Transport: Store in the original foam-lined carrying case. Never store in a vehicle cab or on a job-site material pile where it may be crushed or exposed to sustained heat above 130°F (54°C) — extreme heat permanently damages the compensator's magnetic damping fluid, causing erratic self-leveling behavior.
- Lens Cleaning: Wipe the laser output lens with a clean, dry microfiber cloth before use. Dust, concrete splatter, or adhesive residue on the lens scatters the beam, reducing visible range by up to 40% and making the beam appear to bend or double — both misleading to operators relying on the projected line for layout.
What Are the Most Common Mistakes When Using a Laser Construction Level?
These six errors account for the majority of layout failures and rework events on construction projects where a laser construction level was in use — and all are preventable with correct training and procedure:
- Skipping the Benchmark Verification: Operators trust the laser and begin layout without verifying the projected height against a known benchmark. Calibration drift of 3/16 inch is invisible to an operator at 30 feet but causes a floor topping, ceiling grid, or partition wall line to be systematically out of level across an entire building level.
- Using a Laser Beyond Its Rated Range Without a Detector: Attempting to read a red-beam rotating laser at 200 feet in full sunlight produces a dot that is invisible to the naked eye, causing operators to misread or guess the reference position. The fix is simple: add a laser detector for any work beyond 100 feet outdoors or in bright artificial light.
- Setting the Tripod on Unstable Surface: A tripod set on fresh concrete, loose fill, or a vibrating floor deck drifts during the survey, progressively misaligning the reference beam. Any settlement or shift of the tripod after the benchmark is established invalidates all subsequent measurements until the benchmark is re-verified.
- Ignoring the Out-of-Level Alarm: When the instrument tilts beyond its self-leveling range, the beam blinks or stops — but some operators re-start the unit and continue, assuming it has re-leveled. If the alarm has triggered due to tripod settlement (not initial setup), the instrument is now operating on an unlevel base and all subsequent readings are compromised.
- Using an Indoor Laser Outdoors: Consumer cross-line lasers designed for indoor use are Class 2 (under 1 mW) and produce a beam that is completely invisible outdoors in daylight beyond 15–20 feet. Purchasing a green Class 3R rotating laser or adding a compatible detector is the correct solution for outdoor work — not squinting harder at an undersized beam.
- Incorrect Grade Input on Slope Lasers: Entering 2.0 when 0.2% grade is required — a 10x error — is by far the most costly single-keystroke mistake in construction surveying. Always read back the grade display aloud and have a second person confirm before beginning any slope-grading operation.
Frequently Asked Questions About Laser Construction Levels
Q1: How accurate is a laser construction level compared to an optical level?
A professional rotating laser construction level achieves accuracy of ±1/16 inch at 100 feet (±1.5 mm at 30 m), which is comparable to a well-maintained automatic optical level in ideal conditions. However, the laser level achieves this accuracy continuously across a 360-degree working radius without requiring a second operator to hold a rod, making it significantly faster and more practical on large sites. Survey-grade optical levels still outperform lasers on benchmarking over distances exceeding 500 feet, which is why laser levels have replaced optical levels for most construction layout tasks but not for primary control survey work.
Q2: Can a laser construction level be used outdoors in bright sunlight?
Yes, but only with a laser detector (receiver). In full daylight, the laser dot from even a professional green-beam unit becomes invisible to the naked eye beyond 30–50 feet. A laser detector clips onto a grade rod and uses a photosensor to detect the beam at ranges up to 2,000 feet in full sunlight, providing both an audible beep and a digital readout indicating whether the rod is above, below, or on-grade. Outdoor construction work with a laser construction level without a detector is one of the most common sources of field measurement error.
Q3: Is a green or red laser better for construction use?
Green laser beams (532 nm) are approximately 4 times more visible to the human eye than red beams (650 nm) at equivalent power output, making them the professional standard for large interiors, outdoor use, and any environment with significant ambient lighting. Red laser units cost 15–30% less and offer 20–25% longer battery life per charge, making them the practical choice for small indoor tasks where visibility is not a limiting factor. For a laser construction level that will be used across a range of conditions, green is the recommended investment.
Q4: What IP rating do I need for a laser construction level on a construction site?
IP54 (splash-resistant, dust-protected) is the minimum recommended rating for any laser construction level used on an active construction site. For outdoor earthworks, concrete pours in rainy conditions, or any environment where the instrument may be set down on wet ground or exposed to wash-water, IP65 (fully dust-tight, water-jet resistant) is the appropriate specification. IP67 (submersion to 1 meter for 30 minutes) provides additional protection for work in flooded trenches or on sites with very high humidity and water spray.
Q5: How often should a laser construction level be calibrated?
Field verification (checking against a known benchmark) should be performed at the start of every working day and after any impact or transport event. Full factory or authorized-service calibration is recommended annually for instruments in daily professional use, or immediately after any significant drop. Many government and public works contracts require a current calibration certificate (dated within 12 months) for all measurement instruments used on the project. Calibration service for a professional laser construction level typically costs $75–$200 — a negligible expense compared to rework caused by an uncalibrated instrument.
Q6: What is the difference between a self-leveling and a manual laser construction level?
A self-leveling laser construction level uses an internal pendulum or electronic servo to automatically level the beam within its compensating range (typically ±3° to ±8°), and sounds an alarm or blinks the beam if it is tilted beyond that range. A manual laser level requires the operator to manually adjust leveling screws until bubble vials are centered before each use — a process that is slower, more skill-dependent, and does not provide an alarm if the instrument moves during operation. For virtually all construction applications, self-leveling models are strongly preferred; manual models are used only when intentionally setting a non-level beam angle (for example, on raked ceilings or angled soffits).
Q7: Should I buy or rent a laser construction level?
The standard industry rule of thumb is: rent if you will use the instrument for fewer than 15–20 working days per year; buy if you will use it more frequently. A professional rotating laser construction level rents for $50–$150 per day or $200–$600 per week. Purchasing an equivalent unit costs $600–$3,000. At 20 rental days per year, ownership pays back in 1–2 years for mid-range units. For cross-line lasers used on interior fit-out (purchased at $150–$400), ownership is almost always the correct decision from the first project.
Laser Construction Level Buying Checklist: 8 Questions to Ask Before You Purchase
- What is the primary task — indoor layout, large-site grading, pipe installation, or floor-to-floor transfer? Select the type (cross-line, rotating, grade, pipe, dot) accordingly.
- Is the stated accuracy ±1/16 inch at 100 feet or better for rotating models, or ±1/8 inch at 33 feet for cross-line? Do not accept consumer-grade accuracy specifications for professional structural work.
- Is the laser green beam? Green is recommended for any application involving more than 50 feet of working distance or any outdoor use.
- What is the IP rating? Require IP54 minimum for any site use; IP65 for outdoor or wet environments.
- Does the unit include or support a laser detector for outdoor and long-range work? Confirm detector compatibility before purchase.
- What is the battery life? Require 20+ hours continuous for rotating models used on pours or grading operations.
- Is there a drop protection specification? Look for rubber over-mold housing and a stated drop-height specification of at least 1 meter.
- Does the package include a carrying case, wall mount or magnetic bracket, and tripod adapter? Missing accessories add cost and delay on the first day of use.


